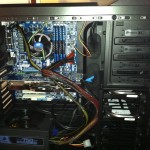
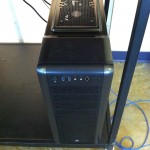
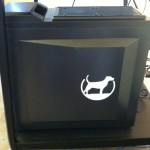
I’d like to start by introducing everyone to Zeke The Render Dog, the newest member of the ACG team. Zeke is a dual boot Mac OS X Lion and Windows 7 equivalent to a Mac Pro.
For a while now we have been discussing the desire to have a stand alone machine that we can use for various tasks that would otherwise hog our individual work computers. With this in mind we originally started looking at the Mac Pro line because this would allow us a high end machine that we can develop both in Mac and Windows. However, after doing some research we discovered that the Mac Pro line hasn’t been updated in almost two years and that there is some strong rumors circulating that the line will be phased out later this year. With this in mind we then moved to the idea of a Hackintosh.
For those unfamiliar with the term “Hackintosh”, it simply means a custom built computer that runs on the Mac operating system. Fortunately enough, Hackintoshs are getting easier and easier to build with the increased desire from the community for custom Mac builds. For our purposes we used a site called TonyMacX86 as well as a few pointers from Matthew Wegner’s blog post Building a Hackintosh.
- Finding the right parts
Now comes the hardest part of the entire process, finding parts that will work. Apple does a wonderful job only allowing there products to work on specific hardware. For a company like Apple this is great because it allows them to cater to very specific hardware requirements ensuring that all of their users have the same experience. However, because of this specially designed operating system it makes it harder to put it on custom hardware.
We decided to follow TonyMacX86’s cutomac Pro build with the i7 processor. Our hardware is as follows:
- CPU: Intel Core i7-2600K
- Motherboard: Gigabyte GA-Z68XP-UD3
- Graphics Card: AMD Radeon HD 6870
- RAM: 16GB Corsair 1600Mhz DDR3
- Case: Corsair Carbide Series 400R
- Power Supply: Corsair 750watt
- HDD: 2 x 500 GB Seagate Barracuda SATA 6Gb/s
The two hardest pieces of the custom build will be the Motherboard and the Graphics card. Since we followed a TonyMacX86’s build we didn’t run into any major hardware problems. We were trying to get an Nvidia graphics card because of the better support with 3D modeling programs but after some investigation we discovered that Lion has better support AMD based graphics cards. Our Nvidia options were either way over our budget or too low powered for what we wanted. With this in mind we just decided it would be easier to go with an AMD card and then upgrade it later with an Nvidia card.
Once we got all the parts, assembly was pretty straight forward. Side note: This is the first time I have used a modular power supply and I can’t recommend it enough. I am very paranoid about airflow in a case and this power supply allowed me to keep all of the cable out of the way of everything.
- Dual Booting Lion and Win7
 We decided to dual boot the system but keep the OSes on separate drives. This allowed us to manage each OS individually and future proof it so that if one drive fails we don’t have to reinstall both OSes. This also allowed us to avoid the extra steps of correctly partitioning and installing a boot loader to the single drive. However, this is were I made the first mistake. Word to the wise if you are going to dual boot with separate drives, install the Mac OS first. I had originally installed Win7 first and then attempted to install Lion. Then, when I went to install Lion one of my BIOS options was not set correct, I had to set it to use ACHI instead of IDE. Once I switched this Lion installed perfectly but Win7 would no longer complete its start-up process. I then had to reinstall Win7 with this BIOS setting and we were good to go. Overall this was a minor mistake but I did lose a few hours having to reinstall all the Win7 software. Considering the only problem we had was to have to reinstall Win7 I think this was a pretty successful endeavour.
- Final Verdict
Now we haven’t done any serious development on this machine yet but we have run Unity on the Mac side and it runs perfectly. I will definitely update this if we run into any serious problems. We are extremely happy with how this all turned out and personally I wish I had some extra cash to do this for myself. With the amount of guides and help on the Internet and the easy time we had I can’t recommend this enough to any one that is interested in building a Hackintosh.


Good job! I was thinking of buying the same build… did you manage to get the USB 3 ports to work in OS X?
@Francesco Yup, worked out of the box no problem.
Pingback: Building Zeke The Render Dog(Hackintosh) | MikeLikesGames