This is the second tutorial in pathfinding, the first can be found here:
Basics of How to Use the Built-in Pathfinding in Unity 3.
In my last post I showed how get basic pathfinding into your game. But if you’ll notice I left out one really important part, jumping! But no fear cause that’s what I’m going to touch on today.
Some Quick Notes before I get started:
- This feature is only available in the Unity Pro Version.
- When I refer to “Agent” I am talking about the object that will be utilizing the navmesh.
- When I refer to “Target” I am talking about the destination that the agent is trying to get to.
- Think of the agent as the enemy in the game and the target as the player the enemy is trying to attack.
- I have created a Unity package for this whole project so you can see exactly what I am talking about. It contains both a part 1 package and a part 2 package.
- Download here PathfindingExampleUnityPackagePart2
Add Jumping
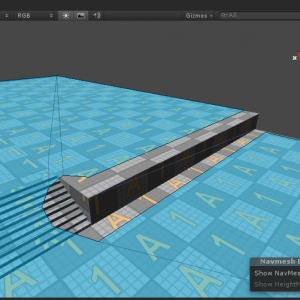
- If we start from where I left off in part 1 we will see that at the short ledges the agent is forced to go around and always use the steps if it needs to get to the other side.
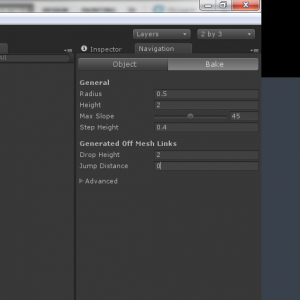
- Adding the ability to jump down is fairly simple. Go to the Navigation panel and under the Bake section, change the Drop Height value to 2 and bake the navmesh again. Now the value of 2 works for this level because of how high my ledge’s are. Depending on your game you may to change this value as well as the Jump Distance. Please check Unity’s documentation to see what will work best for you.
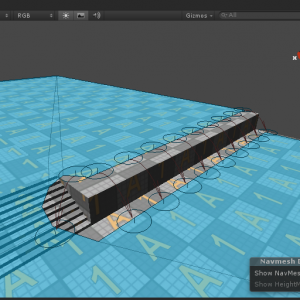
- Now after the bake completes you will see some off-mesh links have been generated (The blue circles with red arrows). Off-mesh links are paths that have been designated for the agent between non-traversable sections of the navmesh. Thinks of it as areas that you not normally just walk on. Go ahead and play the scene and you’ll notice that as you move the target around the agent will jump down from the ledge to reach the target.
- You may notice that the agent will only jump down from the ledges and will go back to using the stairs if it needs to go from the lower level to the upper level. This is the one drawback of the basic Unity navmesh, it will only allow the agent to jump from a higher level to a lower level. This might work for some games but for this tutorial we want to be able to have our agent go both ways and we’ll accomplish that by creating a custom off-mesh link.
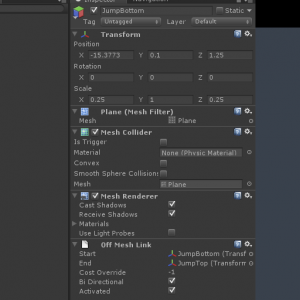
- Creating Custom off-mesh links is pretty simple. Start by creating a plane where you want the agent to be able to jump from(the bottom) and then create another plane on the ledge where you want the agent to be able to jump up to(the top). I also had to scale the Unity built-in plane down to 0.25 to fit this size.
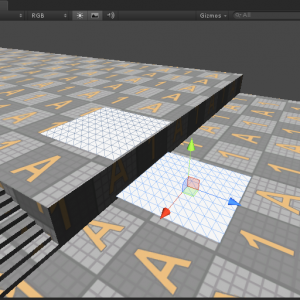
- Now select the bottom plane and go to Component -> Navigation -> and select Off Mesh Link and you will see that the Off Mesh Link Component has been added to the plane. Then in the Off Mesh Link component associate the bottom plane as the Start and the top plane as the End. We will want to leave Bi Directional and Activated checked.
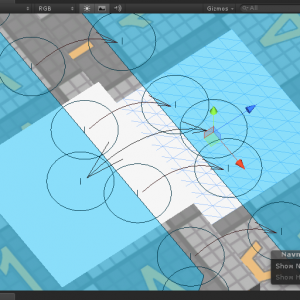
- Now go ahead a bake the navmesh one more time. You will now see an additional off-mesh link created between the two planes as well as the red arrow pointing both ways indicating the bi-directional movement. Now when you play the scene the agent will be able to climb up the ledge at that location. From here we would want to put some more custom off-mesh links along the rest of the ledges so that our agent has a more than just one option to climb up.
Hope you enjoyed these tutorials and hopefully it helps anybody interested in getting some simple pathfinding into their game!

Pingback: Basics of How to Use the Built-in Pathfinding in Unity 3.5 Part 2 | MikeLikesGames